Showing posts with label tips and tricks. Show all posts

Monday, March 17, 2008

Tips n' Tricks: Tracing on Opaques

For a recent SoulPerSuit card I was making, I envisioned a sturdy tree full of branches with roots spreading out to the sources of nourishment and vitality. I also thought it'd be cool if my tree could be metallic to symbolize how a Christian can be a reflective light of wisdom in a dark world.
I decided that metallic ink on black drawing paper was a good combination and began sketching a branchy winter tree on scrap paper.
Turns out I really liked the look and the balance of the branches I'd drawn, but there was a problem- my awesome tree was sketched on white paper, and I really wanted my SoulPerSuit card on black paper.

After noodling on things for a bit, I remembered a great trick my junior high art teacher taught me. It works really well so I wanted to share it with the world.

Taking regular, everyday white chalk, I flipped my tree sketch over to the back side and rubbed it with chalk. Making sure I covered all the drawn lines, I chalked the entire back of my tree.

My black drawing paper awaits.

I gently taped my tree sketch to my black paper, with the tree sketch now right-side-up so the chalked area is touching the black paper.

Using a ball point pen in a different color than my pencil (to make it easy to tell where I've already drawn), I traced all the lines of my tree. When I did this, the ball point pen acted as a stylus to force the chalk off of the back of my sketch and onto the black paper in all the areas I wanted lines.

The beginnings of a tree on black paper.

There are some areas of smudgy chalk, I know. That's typically where my hand rested as I traced with my ball point pen. Never fear, it's very easy to clean up with an eraser.

Once the tree lines were chalked on my black paper, I used metallic silver Windsor and Newton ink to brush over all of my lines. For this particular drawing, I used a variety of brush widths for the tiny ends of the branches all the way down to the fat tree trunk. They were just regular old round watercolor brushes dipped in the ink well and brushed on like paint.

My tree, partially inked.
Can you tell which part has the reflective metallic ink?

Chalk does not resist ink so I could paint right over it, and if there was a part of the tree that I decided not to ink (or thought maybe my chalk lines were too fat), I just worked around that area and erased my chalk marks after the ink was completely dry.

The finished product.

** I used the exact same method on the calligraphied words. My handwriting is not the neatest, so I chose to print my verse in a pretty font, chalk the back of the printout and use a pen as a stylus to get the beautiful font onto my piece of art. Then I carefully inked my lettering, waited for it all to dry, and erased the stray chalk marks.

Thursday, February 14, 2008

The Tool of Process

Part of our mission at SoulPerSuit is to help unpack some of the creative process. While putting together a SoulPerSuit card is a highly individual act, there are a few tools one can keep on hand to make the process less intimidating.

One "tool" to bring with you is an understanding that just as much can be accomplished in the process of creating a SoulPerSuit card as is accomplished in the finished product of a SoulPerSuit card. If we get hung up on producing a museum quality piece of artwork, we'll become just that-- hung up. A person who is willing to embrace a mistake and either learn from it or incorporate it into their card design is going to sleep better at night and probably enjoy their SoulPerSuit experience more than one who can't let go.

Here's a personal example. For our recent SoulPerSuit group in Premium Roast with Ruth, I had an idea for a card that would represent the groaning and duress that is common to all of creation. Each of us endures our specific losses and our individual griefs, but decay and loss in general are something that this entire planet shares. We are all hurting in some way, all mourning the loss of something, disappointed by the decay of one thing or another. To communicate this idea I was going to make a picture of the Earth caught up in a giant tear.
Well, I was.
Until...

My daughter's finger paints proved that it is impossible to achieve a high level of detail with any artistic medium touting itself as, "Ideal for Preschoolers." All my carefully sketched continents and bodies of water became...
... greenish blue globs and smears.
(Certainly not the concept I'd started out with.)

At the point I realized finger paints were not the right medium for map making I was faced with the decision to either scrap this first attempt and start again, or to see what might become of these greenish blue globs of paint. I was also forced to re-examine the concept behind this particular SoulPerSuit card. Was a detailed image of the world vital to communicating my message? Were there any other elements in my card that might be able to communicate the message just as clearly?

Since I had several written portions to this SoulPerSuit card that said what I needed to say, with or without a recognizable globe, I decided to press on with my finger painted "mistake."


"The whole creation groans and suffers... even we ourselves groan within ourselves, waiting eagerly for the redemption of our body." Romans 8: 22-23


Pushing the fingerpaint around, writing out the things I mourn, looking up a Scripture verse to capture the fallen state of creation, and taking a step back to deliberate on how to best use my "mistake" were, for me, all a part of the discovery process. They all worked into my conversation with God. And it's all a vital part of SoulPerSuit. My SoulPerSuit card doesn't have a pristine rendition of our planet, but it definitely gave voice to my feelings and thoughts. And in that respect this card is a success.

Tuesday, October 02, 2007

Graduate Level Coloring

I know that many SoulPerSuit participants, or would-be participants, do not think of themselves as artists. The creative aspect of SoulPerSuit strikes fear in many a heart.

So I thought perhaps I'd give you a little inside information... sometimes you can just let the medium (that's art talk for the "stuff" you use to make your creation- crayon, colored pencil, paint, glue, photographs, etc.) do the work FOR you.

Here's a great example, a SoulPerSuit card I made for our recent study on the book of Esther.

I began with a black and white drawing.
This is a drawing of a tomato. Think of a kid's coloring book.

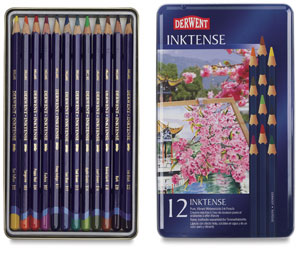
Set of 12
Then I got out our small set of watercolor pencils. I truly think these are God's gift to the creative world. These little puppies are the key to what I'm about to show you. They are not terribly expensive, and you can do so many different things with them. Things that look really sharp and make you look like you've got a Master's Degree in Studio Art. ;) Look for these pencils in arts and crafts stores, or on-line art suppliers like Dick Blick.
Love 'em. Love 'em!

Again, think of a kid's coloring book.
I used a red watercolor pencil for the tomato, and a green watercolor pencil for the stem and leaves. Super easy. Just like being back in 2nd grade.

Here's a fuller shot of the tomato plant. I got a little fancy and colored a tiny tomato like it was still ripening. But basically, I used red and green pencils all the way through.

This pic shows the blue curlicue I added in the air behind the tomato plant, trying to make some sky. What I want to point out is the texture in that curlicue... part of it looks like it's been done in pencil, part looks like it's a watercolor.

This is the trick-
Binney & Smith Crayola® Better Quality Watercolor Brush Series 1121, 6, Hair Length 11/16"
my daughter's paintbrush. After using the watercolor pencils to fill in this black and white picture like a coloring book (and the pencils allow for a lot more control over where the color goes than a paintbrush does), I dipped the brush in clear water and simply dabbed it on the colored areas then let the watercolor pencil melt and moosh into itself. This is what they are made to do.
Such a cool effect!

Here's a wider view of the curlicue.

And a view of the entire SoulPerSuit card, thus far.

After the watercolors dried, I went back with a fine line Sharpie marker and wrote some Bible verses that came to mind. You can write on watercolor pencils, paint over them, or scribble over the top with crayons They're very versatile.

The finished product.

All I really did was color between the lines and then dab over it with water. I let the medium do the work for me and it turned out quite nice, I think.

There.
You've just earned your Master's Degree in Coloring.


*If you have questions about a particular artistic technique or medium, or would like to understand how a technique actually works, please leave a comment here and the research-and-development branch of SoulPerSuit will gladly attempt to hunt down the information. If we haven't tried it ourselves already, you can bet we'd really LIKE to.

Monday, August 13, 2007

SPS Card Tip

the back of my Closed card
When you make your SPS cards, be sure to write on it somewhere how the card came about.
  • What does it mean?
  • Why did you pick those images?
  • What scripture was involved?
  • What's the story?
  • Was there a song involved?

The back of my Closed card.

I typically like my cards to be image driven so there aren't a lot of words involved. Because of this I write on the back of the card any scripture or songs that were an inspiration for the card. Alternately, I might describe what the card meant to me at the time I created it.

the back of my Unseen cardWith the card from the second week of Esther, I was inspired by the idea of God working unseen in my life everyday. The outside of the card has images that represent different days of my life. Open the door behind these days and see God's hand providing: sunshine, rain, coffee, milk, chocolate, dogs, computers, etc. On the back of the card I wrote what this means to me.

A couple of amazing things happen when people look at each other's cards. Most of the time, the artist teaches the viewer a new way of looking at an idea or scripture. At other times, the view interprets the card to mean something very relevant but entirely different than what the artist intended and the artist learns something new. Both of these are thrilling experiences.

Want a bigger surprise?

Look at your card six months or more from now. You might be surprised by the words you wrote. They may reveal how much you have incorporated this insight into your life. With the distance of time, you may see more clearly where you were at the time you made the card. You also may gain a whole new meaning from the card that even you didn't see the first time.

Isn't this a lot like scripture itself?

Tuesday, April 10, 2007

What do you do with the Cards?

We've gotten this question before. So you've made these cards during Mocha on the Mount. Now what do you do with them?

Depending on the size and mediums used, here are some ideas we've heard or seen in the past:
  • a book mark
  • scan and use as background image on computer
  • glue in a journal and build and entire altered book of cards
  • hang on frig ;)
  • set in window over kitchen sink
  • attach to edge of compute monitor (like a post-it note)
  • make into a greeting card and mail to a friend
Some of you full-time creative thinkers may have some other ideas. What are you going to do with your cards?